Continental Conversions, Repaints and Weathering

Buntobox

Active Member
the SBB kept their engines clean
Actually Michael, they didn't, at least they didn't before about 1980. I have hundreds of photos showing locos and coaches so utterly filthy you can barely tell what colour they are! Here are a few examples:

SBB-36-042.jpg

Clean & Dirty on the same coach.jpg
Look at the van just behind the loco!

11101_Z_rich_1020-012.jpg

Filthy coaches 2.jpg

Filthy Heavyweight (5).jpg

This is the look I'm striving for. I just love it and it makes the models look so much more real than the shiny "out-of-the-box" look most models display.

Alan
 

Buntobox

Active Member
After another longish break in which SWMBO had me decorating, I'm back to painting and weathering. I've got a Lima EW1 on the bench at the moment. It had the modern <+> SBB CFF FFS emblem on it and I wanted to take it back to the original SBB + CFF one. My main problem was paint. The green used by the SBB is an NCS colour which is almost impossible to source in the UK. The nearest equivalent is RAL 6009 which is almost equally difficult to find. A bit of research however threw up a supplier in Cheltenham that specialises in car models and they do the full range of RAL colours in 60ml jars called Zero Paints that are pre thinned for airbrush use. They're toluene based so a bit dangerous to use on plastics unless they're fully primed but that said Halfords rattlecan primer suits. I have gone down that road and it works just fine. My EW1's bodyshell was stripped of the factory finish, primed with Halfords white primer and gently rubbed down afterwards to give a perfectly smooth base for the colour to be applied. So far I've sprayed the interior the correct cream and I have to say the paint produces a beautiful finish if sprayed directly from the jar at 18psi. I'll do the green tomorrow and keep you posted but so far I'm impressed.
 

Buntobox

Active Member
I'm afraid I haven't done the green yet as I had a bit of a disaster yesterday. I was shaking the bottle in readiness for setting up to spray when it slipped from my hand and smashed on the floor...all over the grey porcelain dining room tiles and the edge of a 8' x 5' woollen rug. Mrs. B was not best pleased to put it mildly and threatened me with my life if I didn't fix it. It took me about an hour with a bottle of cellulose thinners, two rolls of kitchen paper and a scrubbing brush to get it off the tiles and out of the grout... but half the house smelled like a paint factory and the rug was a write-off. I had to spend yesterday finding her a new one...and paying for it! It arrived about ten minutes ago and earlier today so did the replacement paint. Mrs. B is now happy but my God it was a close shave! The green goes on the coach body tomorrow, and has to be shaken well away from the dining room table!

Not my finest hour.
 

Buntobox

Active Member
Now finally, to business.
I finally managed to get the new Zero Paints SBB green (RAL 6009) onto my Lima EW1 bodyshell yesterday and I have to say I'm mightily impressed with it. It went on like silk and has produced a finish that is arguably the equal of, or even better than, a factory finish. It's exquisite. Although they say it goes on matt it's actually a beautifully smooth satin sheen and for me at least needs no further treatment until after the lettering has been applied. I've been trying to find this quality of finish for a very long time and it has, up until now, mostly eluded me. Thinning paint in tiny quantities for airbrush use is never an exact science and it was something I always found hit and miss at best. This toluene-based paint is already thinned for spraying and unlike the Vallejo Model Air I previously used, can genuinely been sprayed straight from the bottle. It's the best paint I've ever come across by a country mile and since all my models are continental outline they all are painted in RAL colours and the Zero Paints people do the entire RAL range, something I never up until now found except from Europe and getting a hold of them was nigh on impossible given the restrictions on posting such things. I'm therefore cock-a-hoop at never again having to make do with the nearest alternative colour to what I'm actually after!
I'll post a photo later when Mrs. B comes home and tells me where she's hidden the camera.
 
Last edited:

adrian

Flying Squad
I finally managed to get the new Zero Paints SBB green (RAL 6009) onto my Lima EW1 bodyshell yesterday and I have to say I'm mightily impressed with it. It went on like silk and has produced a finish that is arguably the equal or even better than a factory finish.
Glad to hear about the results, I've been using Zero paints for all my recent builds and likewise a satisfied customer.
 

Buntobox

Active Member
Sorry chaps. I tried to photograph the finish on the coach but my photography skills just aren't up to it. The finish is beautiful but when I tried to capture it, it looked like I'd painted the thing with a loo brush. Photos to follow when it's finished I think.
 

Buntobox

Active Member
I've had an utter disaster!
This is the first coach I've repainted and subsequently attempted heavy weathering on. The Zero paints green was gorgeous once it was gloss varnished with ZP's own lacquer. I then applied all the lettering transfers and once they were hardened, I sprayed a couple of coats of neat Winsor & Newton matt varnish to give the weathering something to cling to. I then applied my own enamel weathering mix and then tried to remove it in patches over the insignia as the SBB was wont to do in the sixties and seventies. I've done this on factory finishes and it's worked a treat. This time however...

DSCF8478.JPG

As the enamel thinners I was using dried, these white deposits began to show up and wouldn't come off. They just got worse the more I tried to remove them. I thought the thinners might be reacting to the glue of the transfers so I tried the same thing further down the coach side and you can see the result. The second class markings at the left hand end is how it started. This is a write-off and I'm going to have to find out what happened before I attempt this again. I think it might be the enamel thinners reacting to the Winsor & Newton varnish but I won't know for sure until I run some tests on scrap plastic sheet. If it is then I'm not sure what to do because the transfers need to be lacquered to protect them but at the same time it can't be removed by the thinners treatment that creates the patches. The ZP lacquer will probably attack the transfer film so I'm open to suggestions of what lacquer to airbrush on that can give me the (probably satin when I think about it) finish I need to do this that won't then react with thinners and create this mess.
 

James Spooner

Western Thunderer
I've had an utter disaster!
This is the first coach I've repainted and subsequently attempted heavy weathering on. The Zero paints green was gorgeous once it was gloss varnished with ZP's own lacquer. I then applied all the lettering transfers and once they were hardened, I sprayed a couple of coats of neat Winsor & Newton matt varnish to give the weathering something to cling to. I then applied my own enamel weathering mix and then tried to remove it in patches over the insignia as the SBB was wont to do in the sixties and seventies. I've done this on factory finishes and it's worked a treat. This time however...

View attachment 238109

As the enamel thinners I was using dried, these white deposits began to show up and wouldn't come off. They just got worse the more I tried to remove them. I thought the thinners might be reacting to the glue of the transfers so I tried the same thing further down the coach side and you can see the result. The second class markings at the left hand end is how it started. This is a write-off and I'm going to have to find out what happened before I attempt this again. I think it might be the enamel thinners reacting to the Winsor & Newton varnish but I won't know for sure until I run some tests on scrap plastic sheet. If it is then I'm not sure what to do because the transfers need to be lacquered to protect them but at the same time it can't be removed by the thinners treatment that creates the patches. The ZP lacquer will probably attack the transfer film so I'm open to suggestions of what lacquer to airbrush on that can give me the (probably satin when I think about it) finish I need to do this that won't then react with thinners and create this mess.
Very sorry to see that. I’m no expert on these matters but do recall reading (possibly in these pages somewhere) that certain combinations of paint types really don’t get on with each other and can cause the sorts of effect you have sadly experienced. It is probably worth a Google to see what can be mixed with what.

Nigel
 

Buntobox

Active Member
I painted, varnished and test lettered three pieces of plasticard to test various combinations of paint and thinners to see if I could find the reason for the mess in my previous post. I was using Revell enamel thinners to remove the excess weathering over the insignia and that was the problem. It reacted badly with the Winsor & Newton matt varnish I had used to protect the transfers and left these awful white marks. Humbrol enamel thinners didn't have the same effect but they took a long time to dry out and created a tide mark in the paint. I then tried BS245 white spirit and that not only didn't react with anything but it dried really quickly and left no tide marks. I don't know what the Revell thinners actually are in chemistry terms but it's certainly not BS245. I am now standardising on the BS245 because it has no ill effects on either my varnish or anything else.
This, then, is the result of a full strip-down and repaint of the offending vehicle complete with new weathering...

DSCF8483.JPG
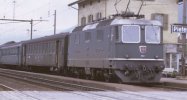
The muck is extreme but that is how these carriages mostly looked in the 70s and if you don't believe me, look at the example here, directly behind the locomotive. If anything, the model's cleaner!

Filthy EWI.JPG
 

Buntobox

Active Member
The next project I have on the stocks is the conversion of a Light steel B (2nd) like this one...

16V-020.jpg

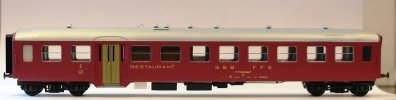
...into one of the five that were converted to restaurant cars in 1962 and 63...

mh_02641.jpg

This conversion is exactly what the SBB did in reality; 10003 started life as an ordinary 3rd class carriage. One of the vestibules was removed and the interior was divided into two saloons: a small one and a larger one that had 36 seats and housed the kitchen. The small one remained unchanged and had 16 seats.

The first job is to strip the shell of everything and remove the green paint from it. Removing the doors was tricky as they were glued in pretty thoroughly and I had to get at least two of them intact as the outer edges of each will be used to create the small windows either side of the new, narrower doors...

10-05-2025 13-13-39.jpg

I managed it with a great deal of difficulty and breathed a sigh of relief. Stripping the paint took a while. I use my own mix of 50% isopropyl alcohol and 50% butyl glycol as a stripper and that softens the paint to the point where it can be removed with an old toothbrush in about thirty minutes, normally. In this case, Liliput's paint was like glue and reluctant to come out of corners and seams and it took a lot of work with Tamiya pointed cotton buds and extra stripper to remove it all. Pictures to follow.
 

Yorkshire Dave

Western Thunderer
Interesting conversion of the Leichtstahl wagen. Out of curiosity what fuel was used in the kitchen for cooking? gas? as the purpose built Leichtstahl and the later EW1 Buffet/Speisewagen were electric and also had a pantograph to maintain power whilst stood in stations.

Came across this on a Schweiz N gauge forum Leichtstahl WR Restaurant "Buffet" - spur-N-schweiz Forum

buffet lsw-02.jpg

There's also a drawing providing the seating layout in this thread https://forum.spur-n-schweiz.ch/index.php?thread/6075-leichtstahl-buffet-wabu/
 

Buntobox

Active Member
As far as I can ascertain, the kitchens on these cars were coal fired. Thank you for the link...I already have that photo and drawing. They were the main reason for deciding that this conversion would be relatively easy.
 

Buntobox

Active Member
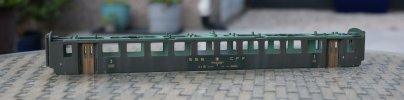
Here is the starting point; the stripped shell, ready for its modifications. The door apertures were badly damaged during the process of removing the doors proper. It's not an issue as one pair of them will be remade using Plasticard and the other pair get replaced with windows taken from a light steel donor restaurant car that I picked up cheaply. That will also provide the Klein windows for the rebuild.

DSCF8495.JPG
 

John57sharp

Western Thunderer
I’ve just caught up with this thread with my morning coffee. Really enjoyed reading about your work, and seeing the fine results.
Glad you survived the great paint disaster with the rug! It’s something we’ve probably all done, or come close to, I suspect.

Cheers
John
 

Buntobox

Active Member
Here the shell has had the doors removed at one end in readiness for fitting the new window apertures from the donor coach. The other end's apertures have been cleaned up, ready to be reinforced for fitting the new doors. The steps have also been removed...one set obviously not being required, the other set because they're actually set too far forward and appear to erupt from the front face of the tumblehome when in fact they should be at the bottom of it and flush with the panels on which the windows either side of the doors are fitted.

DSCF8515.JPG
 
Last edited:

Buntobox

Active Member
I know it's been a long time but it's not been a good year for my modelling. I just seemed to lose my enthusiasm and since it was such a nice summer I decided to spend most of it in the garden.
However, I've got back to it now and have almost finished the light steel SBB restaurant car. It's been temporarily assembled to get this photo before I paint the underframe and then weather the whole thing. I've fitted this one with Alan Gibson EM wheelsets regauged to 16.5mm on cut down axles. They look so much better than the standard pizza cutter wheels!

DSCF8716.JPG
 
Last edited:

Buntobox

Active Member
I've decided, after various trials and experiments with EM wheels, that I'm going to use regauged P4 standards for my wheels and track. P87 wheels are viciously expensive and aren't that different to P4 wheels which are far easier to come by in the UK...and a lot cheaper. Here's a picture of one of my coaches fitted with Alan Gibson 10.5mm disc wheels mounted on axles I turned down using a file and my Proxxon drill. The new pinpoints are polished with a fine file and glass fibre brush and then the wheels are mounted on the axles and set to a back to back of 15.48mm, the P87 standard. They look terrific and the rolling stock runs beautifully smoothly without any slop or wobbling on the track.

IMG_0630.jpeg

I've also re-done my layout plan on Templot and the tighter flangeways of 0.67mm just look so much better than they did in standard HO:

28-05-2026 14-53-47.jpg
 
Top