7mm Richards P48 US Thread

richard carr

Western Thunderer
I have been spending quite a bit of time in Chicago recently, I'm back there agai now so I haven't had too much time to work on models.

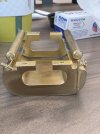
I did acquire this on Ebay a few weeks ago a 2600 gallon EMD fuel tank
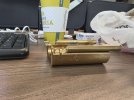
20260414_163126.jpg

20260414_163419.jpg

The MTH EJ&E GP38s come with a much larger fuel tank than they should have.
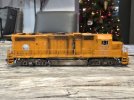
20251230_161818.jpg

The real thing has the 2600 gallon tank
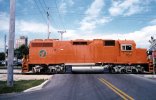
kerner097.jpg

So the plan it fit this new tank to the model and fit a new speaker into the tank.

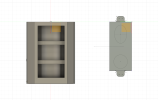
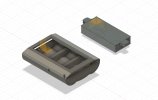
I'm also trying to draw a tank in Fusion, this is how far I've got. Jim very kindly provided me with drawings for the tank, so the brass one isn't 100% accurate by any means. It was challenge drawing the end profile in Fusion trying to get everything properly dimensioned.
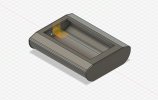

EMD fuel tank in fusion vv2.jpg

Finishing this should keep me busy while I'm here.
 

richard carr

Western Thunderer
So this week I have been busy drawing, if you really want to learn a CAD package you need to draw something for real

EMD fuel tank in fusion vv2 (Assembly).jpg

So this is how far I've got, I've added the fuel filler and the fuel gauge and some internal supports to stiffen the tank.
The object above it is a Tang Band speaker as that is want I want to fit inside the tank and some of those supports will probably need to be modified so it fits. Both the tank ends have been turned off in these images.

And if looking at that photo you are thinking that it's not going to fit, I thin this one shows that it will.


EMD fuel tank in fusion vv2 (Assembly) p2.png
 

richard carr

Western Thunderer
I'm back at home this weekend, so I have had a chance to do a few bits and pieces before I head back to Chicago on Tuesday.

I managed to bring this back with me from the last trip

20260523_124653.jpg

An MP15 DC, this one isn;t specifically an SP unit but it does have the spare parts with it to be one. But first I'm going to sort the MP15AC.
It was easy to strip down into it's main parts, as you can see the chassis isn't quite working as intended.

20260523_125204.jpg

It also uses the american style pickup system with 2 axles on each side picking up.
It's going to need a bit of fixing, the model is from March 1986 so it's over 40 years old now. The plastic looks very brittle.

20260523_125207.jpg

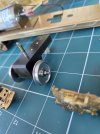
I took one of the trucks apart and set about making it P48

20260523_130225.jpg

Everything was going fine until it cam to getting the wheels back on the axles. One set really didn't want to go back on and might need some more work as the gear isn;t correctly centred. On the other one the insulated wheel went on ok but the uninsulated moves freely on the axles, so it's had to be loctited in place.

20260524_124044.jpg

The big thing that is incorrect on the model is the fuel tank, it's an 1100 gallon tank when it should be a 1400 gallon tank ie a foot longer.
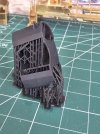
Jim had already drawn an 1100 gallon tank for his SW1500 project so he very kindly gave me the CAD for that and I have stretched it in Turbo cad, ipmorted it to fusion and generated an STL file and printed it.

There are separate end pieces and there will need to be a support piece to locate the tank on the model but all easy enough to sort out.

20260524_124049.jpg

You can see how much larger the tank is here.

20260523_124250.jpg
 

richard carr

Western Thunderer
I'm back in Chicago now but before I went I managed to do a bit more on the MP15. You can't buy replacement P48 wheels for these older models with 4.5mm axles, so these wheels need machining to P48 standards, thats fairly easy. If you want to narrow the bogies then you need to shorten the axles (so there's no going back after that) and narrow the bolster.

The end result of all that effort is this the top truck in the photot below

20260525_130020.jpg

I took 1.5mm off each axle end, the hardest part was getting the wheels back on the axles postioned so that the gear is in the centre of the axle.

One wheel went on far too easily and had to fixed in place with loctite 603. Another almost broke the vice and of course meant that getting it in right position was a real pain.

As for the bolster I spent 30 minutes trying to adjust it by drilling new holes but decided it was just easier to print a new one on the filament printer, it's plenty strong enough and only took 20 minutes to print.

I also printed a new version of the fuel tank


20260524_124044.jpg

The end plates still need printing but it's looking a lot better.
 
Top